This article reviews the steps to factory reset the Access200™ biometric reader.
Why factory reset the Access200™?
A factory reset erases all configuration from the Access200™ reader. If you have encountered any unexpected issues with your device, the support team may ask you to factory reset your Access200™. This will completely erase all configuration information and restore your Access200™ to its factory state.
Get ready to factory reset
It is recommend that Access200™ readers are factory reset during off-peak hours. During the factory reset process, the reader cannot be used. The process to factory reset the Access200™ and return it to the latest firmware and software versions can take as long as 25 minutes.
Before performing the factory reset, you should have the latest version of the Access200™ firmware and software update files. This will be used at the end to return your device to the latest firmware and software versions. If you need the latest versions please contact us at support@princetonidentity.com.
If the Access200™ is still functional, the local face license should also be downloaded prior to starting the factory reset process. This is downloaded by navigating to the Access200™ web page, then clicking "Settings" -> "Caching" and under "Face Matching" select "Download" next to "License Status Valid".
Method 1: Reset the Access200™ using the device's screen
The first method to factory reset the Access200™ requires that the device is still functional. It also requires software version v2.22.0 or later. This is the only method that can be used with an Access200w™.
1. Place the device into maintenance mode. There are 2 ways to achieve this:
- Remove the device from the wall plate, and while it is still powered on, press the button on the back labeled "MAINT." (This is only applicable for an Access200™ indoor reader.)
- Navigate to the device's web page and at the top click "Diagnostics", then "Take offline for diagnostics". On the device's screen, press your finger on the screen and hold it there for 4 seconds, then let go.
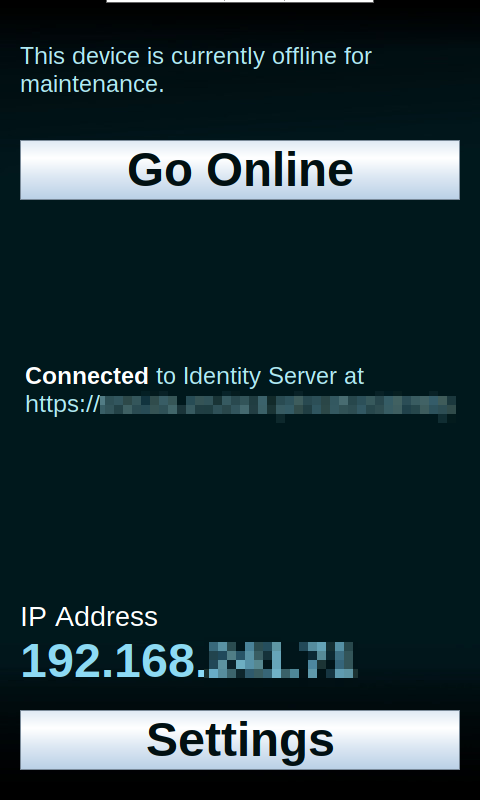
Screen of Access200™ when in maintenance mode.
2. Click the "Settings" button at the bottom of the Access200™ screen.
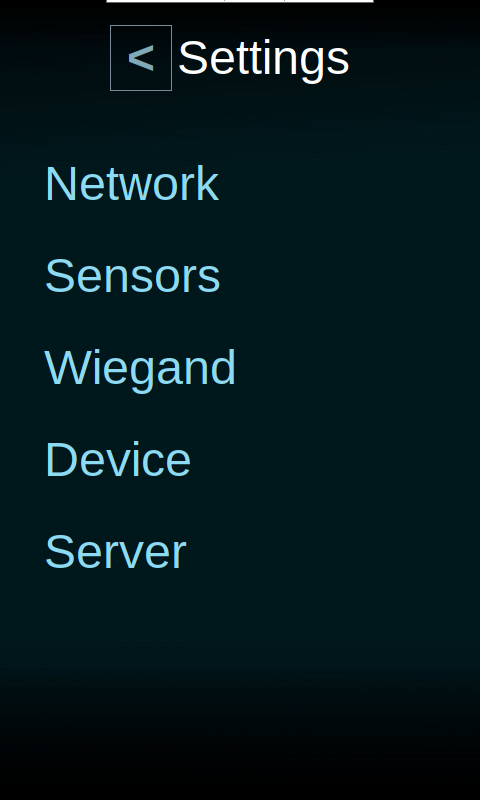
Settings screen of Access200™
3. Select "Device" from the list of options.
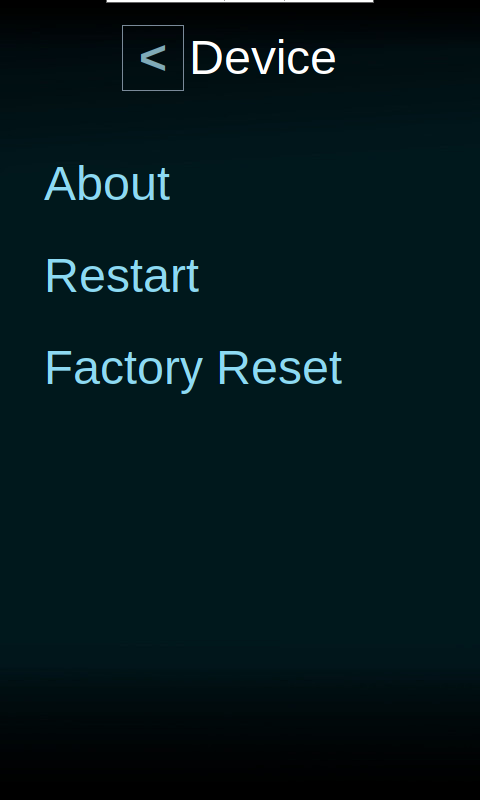
Device screen of Access200™
4. Select "Factory Reset" from the list of options.
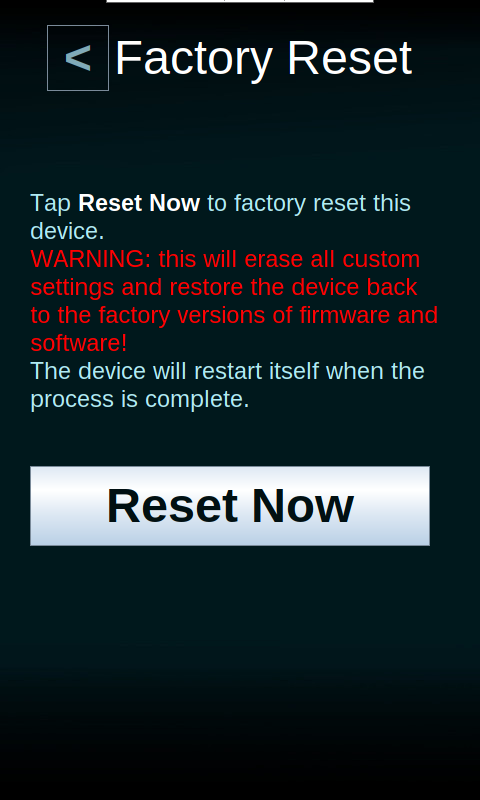
Factory reset screen of Access200™
5. Click "Reset Now".
Method 2: Reset the Access200™ using the reset button
The second method to factory reset the Access200™ does not require access to the device's web page and does not require the device to successfully complete the startup process. This method is not possible with an Access200w™.
1. Remove power from the device.
If the device is powered over PoE+ then this is achieved by removing the ethernet cable from the back of the reader. If the device is powered over 24V then this is achieved by removing the terminal block from the wall plate.
2. With the device powered off, press and hold the button on the back of the device labeled "RESET". Do not let go of the button.
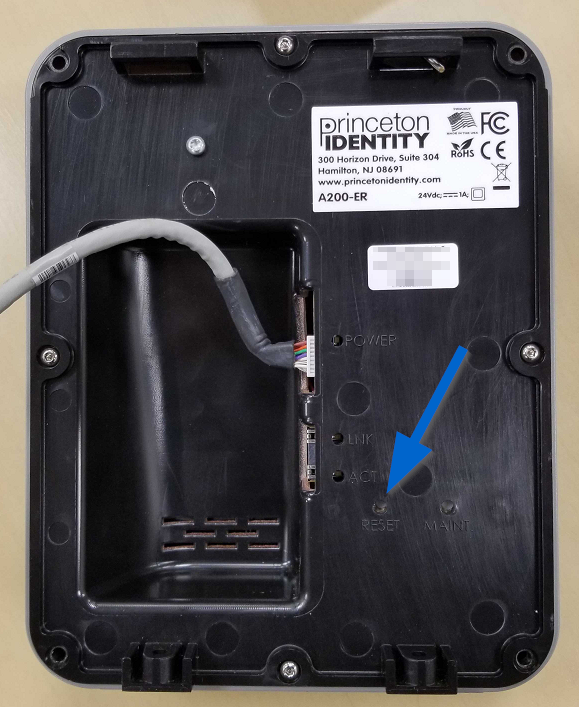
The location of the reset button on the back of the Access200™
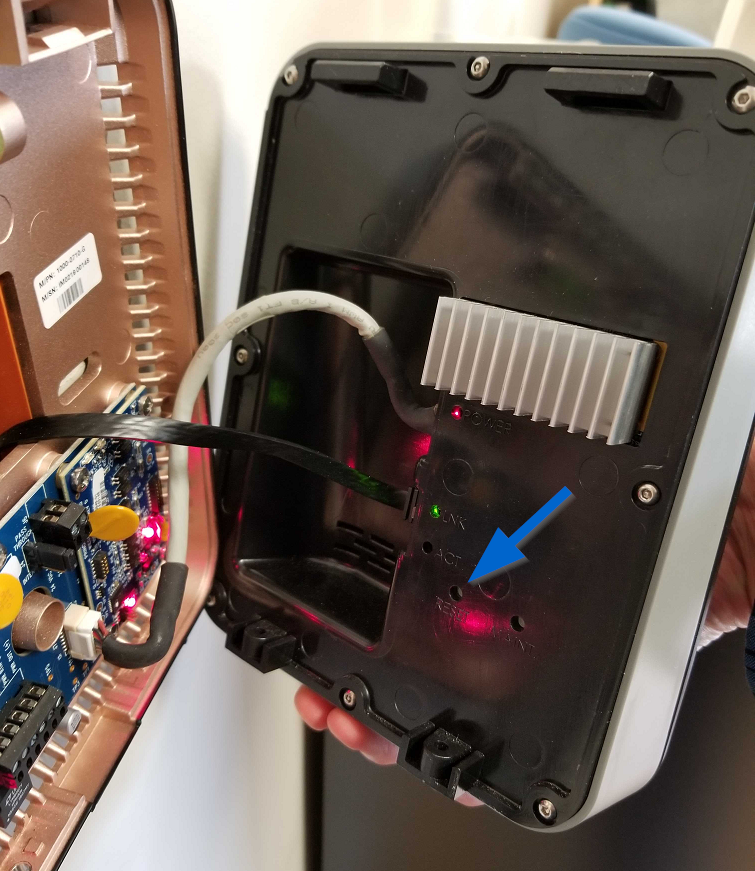
Accessing the reset button on an Access200™ mounted to a wall
3. Apply power to the device.
If the device is powered over PoE+ then this is achieved by connecting the ethernet cable to the back of the reader. If the device is powered over 24V then this is achieved by connecting the terminal block to the wall plate.
4. Continue holding the button on the back until the screen displays "Performing factory reset...". Then let go of the button.
Factory Reset
The device will now perform the factory reset procedure. On the screen you will see text that says "Performing factory reset..." with a black bar that will fill as the process completes. This process typically takes ~5 minutes.
When the process has completed the device will display the "Set me up" screen and display the device's IP address.
You should now update the software and firmware to the latest versions.
If you downloaded the face license, this should be uploaded using the
When all the updates are complete, you can connect the Access200™ to the Identity Server.