This article describes how to add biometrics to a person's profile in the Identity Server (IDS), and it assumes that the person has been added to IDS manually (see Manually Add a Person to the Identity Server) or using a physical access control system (PACS) sync.
To be able to enroll people to the IDS, you must be logged in and be a user with the "admin" or "enroller" role.
Enrollment can be carried out using one of the three methods described below.
1. Enrolling in default mode
For default mode, at least one Access200 indoor unit must be connected to IDS and configured for enrollment. Follow the steps described in the Appendix below to configure the enrollment device.
From the IDS home page click on the “Enrollment” link, in the middle of the page under the “People” heading.

Clicking the “Enrollment” link will take you to the IDS Enrollment page where all Access200 devices connected to the system and configured for enrollment will be listed. Select the device to be used. If this is your first time navigating to this device’s webpage, Google Chrome will warn you that “Your connection is not private”. Proceed to the device webpage. The device should log in automatically. If you are prompted for a username and password, the default username is “admin”, and the default password is “password”.
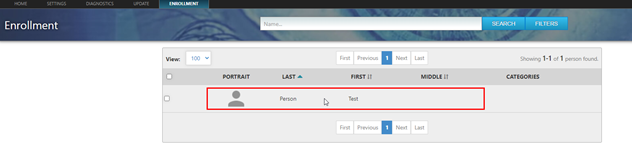
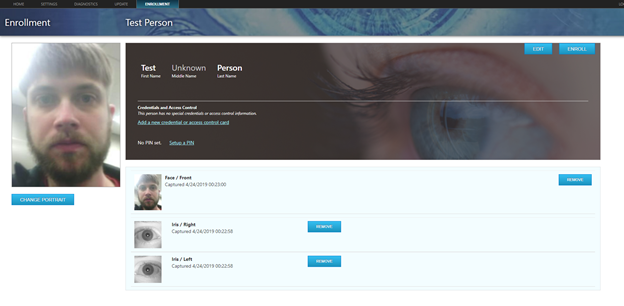
In the table, click on the row of the person that you will be enrolling biometrics for. In the example below, we will be enrolling biometrics for “Test Person”.
On the page of the person, click “Enroll”.
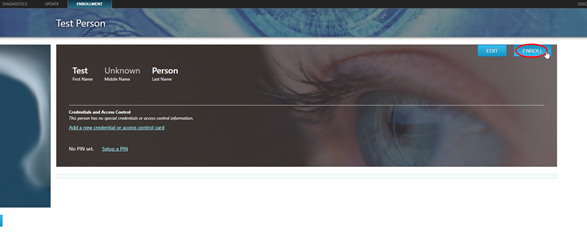
After clicking the “Enroll” button, you will be taken to the “Add Biometrics” page, and there will be a preview of the Access200 camera view. In default mode, the person being enrolled will interact with the Access200 to enroll themselves.
The Access200 will show the “Welcome” video. The person should tap the screen once to begin the encounter preview. The device will display “Align with guides. Touch to begin” – this screen is shown below.

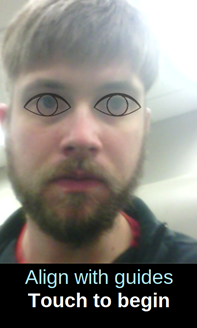
For the best results, the user should follow the recommendations described in Enrollment Best Practices. Once the person has aligned themselves, they should touch the screen to begin.
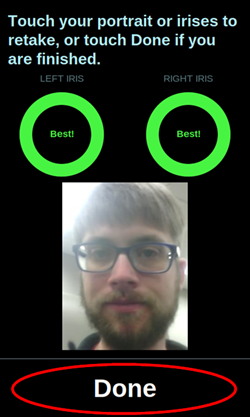
When the encounter completes, the device will display the results screen on the device, and the biometrics will show up on the webpage. Biometrics are graded along a scale: POOR -> FAIR -> GOOD -> BEST. Ideally all biometrics will be BEST prior to enrolling.
If the user did not achieve a grade of BEST for both irises, the device will prompt the person for another encounter. The biometrics that are graded the highest will be the ones used for the enrollment.

On the results screen, the user can start an additional encounter by clicking on the circles below the words “Left iris” or “Right iris”. They can also take a portrait photo by clicking on their photo on the bottom of this page. During the portrait photo, it is not necessary to properly align with the eye guides.
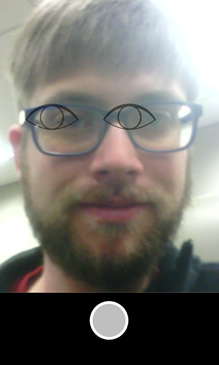
When the user has finished enrolling biometrics and they are satisfied with their portrait picture they should tap “Done” on the screen.
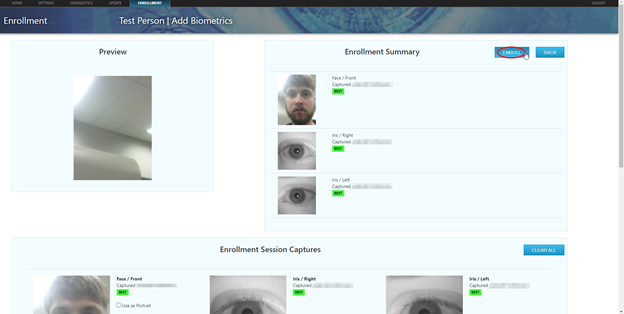
On the web page, scroll down to select the Portrait that will be used for the person’s profile. Check the box “Use as Portrait” to set the desired picture as their portrait.

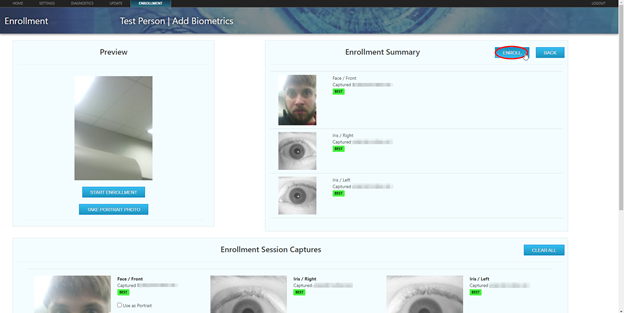
On the top of the web page, the person’s biometrics are ready to be enrolled. Click on “ENROLL” in the “Enrollment Summary” section.
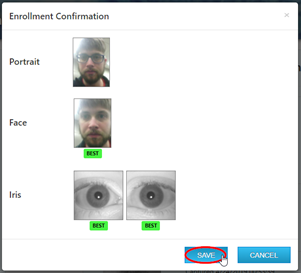
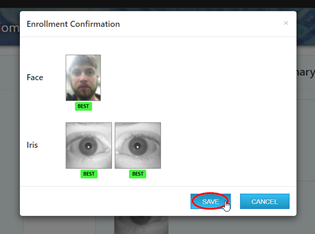
On the “Enrollment Confirmation” screen, the user’s chosen Portrait will display, as well as the captured biometrics which will be enrolled. Click “SAVE”.
You will be redirected to the person’s enrollment page, which now includes all the biometrics which were enrolled and display the selected Portrait photo.
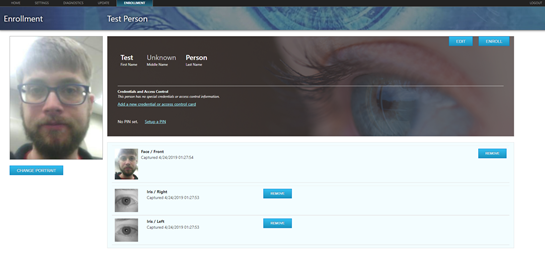
Congratulations, you have enrolled your first person into the Princeton Identity Identity Server.
2. Enrolling with Contactless Enrollment
For Contactless Enrollment, at least one Access200 indoor unit must be connected to IDS and configured for enrollment. Follow the steps described in the Appendix below to configure the enrollment device and be sure to select the Contactless Enrollment option on the Access200 enrollment device.
From the IDS home page click on the “Enrollment” link, in the middle of the page under the “People” heading.
Clicking the “Enrollment” link will take you to the IDS Enrollment page where all Access200 devices connected to the system and configured for enrollment will be listed. Select the device to be used. If this is your first time navigating to this device’s webpage, Google Chrome will warn you that “Your connection is not private”. Proceed to the device webpage. The device should log in automatically. If you are prompted for a username and password, the default username is “admin”, and the default password is “password”.
In the table, click on the row of the person that you will be enrolling biometrics for. In the example below, we will be enrolling biometrics for “Test Person”.
On the page of the person, click “Enroll”.
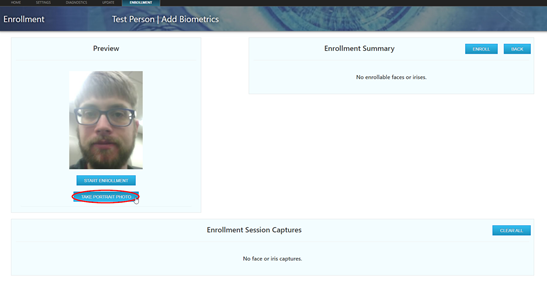
After clicking the “Enroll” button, you will be taken to the “Add Biometrics” page, and there will be a preview of the Access200 camera view. The person who will be enrolled should use the Access200 and should follow the recommendations described in Enrollment Best Practices.
When the person is ready, click the “START ENROLLMENT” button. This will begin the encounter.

When the encounter is complete, the web page will show the person’s biometrics. Biometrics are graded along a scale: POOR -> FAIR -> GOOD -> BEST. Ideally all biometrics will be BEST prior to enrolling. If you would like the person to attempt a second time, simply click “START ENROLLMENT” again. The biometrics that are graded the highest will be the ones used for the enrollment.
If the user would like to take a portrait photo, have them align themselves on the screen, and prepare to take the photo. When they are ready click on “TAKE PORTRAIT PHOTO” in the Preview section.
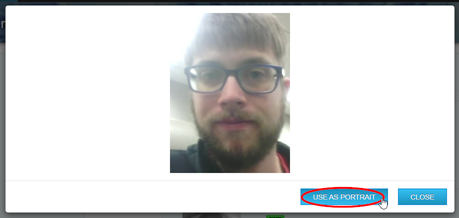
When the portrait is taken, a box will display. Click on USE AS PORTRAIT to set this image as the person’s portrait.
When you are satisfied with the biometrics that are listed under the “Enrollment Summary”, click on “ENROLL”.
On the “Enrollment Confirmation” screen click “SAVE”.
You will be redirected to the person’s enrollment page, which should now include all the biometrics which were enrolled.
Congratulations, you have enrolled your first person into the Princeton Identity Identity Server.
3. Automatic Enrollment
The third method for completing enrollment is Princeton Identity's new Automatic Enrollment process. Automatic enrollment does not require an Access200 to be configured for enrollment mode, nor does it require an admin or enrollment operator to be present. Follow the article here for help configuring Automatic Enrollment: Configuring automatic enrollment on the Access200
Appendix: Setting up The Access 200 Indoor Unit for Enrollment
In order to conduct enrollment using the methods described in Sections 1 and 2 above, at least one Access200 indoor unit must be connected to the IDS and configured for Enrollment mode.
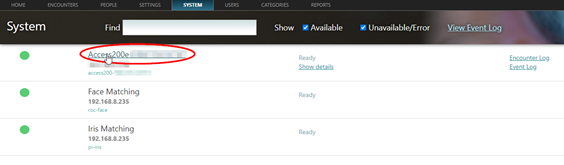
To do this, navigate to the “System” tab of the IDS. Choose one of the devices that start with “Access200” or “Access200e” and click on the link. Clicking this link will automatically log you into the device’s page. If this is your first time navigating to this device’s webpage, Google Chrome will warn you that “Your connection is not private”. Use the previous steps to proceed to the device webpage.
Click on the “Settings” tab of the Access200 webpage.
Click on “Mode” in the left column and click on “Switch to Enrollment Mode”.

This will allow you to use this device in Enrollment mode and will result in the “Enrollment” link appearing on the IDS home page under the “People” column. From here, click Change Enrollment Mode. The new page that appears will show two different enrollment modes: Enroll to Identity Server and Enroll to Card, as well as an option to use Contactless Enrollment.
- Enroll to Identity Server - The enrollment process will add the users face and irises to the People page in the IDS.
- Enroll to Card - This mode follows the same process as Enroll to Identity Server. However, once the subject's face and irises are captured, they will be written to a smart card using the Access200 internal card reader.
Regardless of which method is selected, the user may also choose to use Contactless Enrollment, which must be initiated by the system administrator or enrollment manager ("Operator Initiated"). In this case, the Access200 enrollment device will begin the enrollment process for the subject when the selected Contactless Enrollment event occurs.