This article reviews the steps to back up the Identity Server (IDS). This article applies to the physical IDS100™, IDS200™, and IDS300™ appliances and the virtual IDS appliance.
Why make backups?
A backup of the IDS is the best way to protect against hardware failure or corruption of your software that may cause issues with your system. Regular backups are recommended to help mitigate any possible issues and to reduce unexpected downtime. Backups always include personal details, categories, and biometric data. Depending on settings they may also include personal portraits and biometric source imagery. The built in backup system does not back up encounters or IDS settings. If you don't proactively create backups, then you are at risk of losing the personal data and biometrics that have been added to your system.
For the virtual IDS, backups can also be done by leveraging the tools provided by your virtual infrastructure provider. Backups using these 3rd party tools would likely include the entire IDS system, including personal data, encounters, and IDS settings.
Backups cannot be restored to the physical IDS appliance if they are larger than 2 GB in size. As a guideline, typically 2,500 people with imagery can be stored in a 2 GB backup. If imagery is not included, then typically 10,000 people can be stored in a 2 GB backup. In order to determine the exact size of your backup you must download it and view the file size. If you find that you are over or close to the 2 GB limit, turning off the "profile portraits" and "enrollment imagery" check boxes will significantly reduce the size of your backup file.
Configure your backup
The IDS home page can be found at https://<IP-address>:8443, where "<IP-address>" should be replaced with the IP address of the IDS. Navigate to the IDS home page and log in. Only users with the "admin" role can configure or modify the backup settings.
Click on the "Settings" tab at the top of the screen, or the "Settings" link underneath the "Setup" heading.
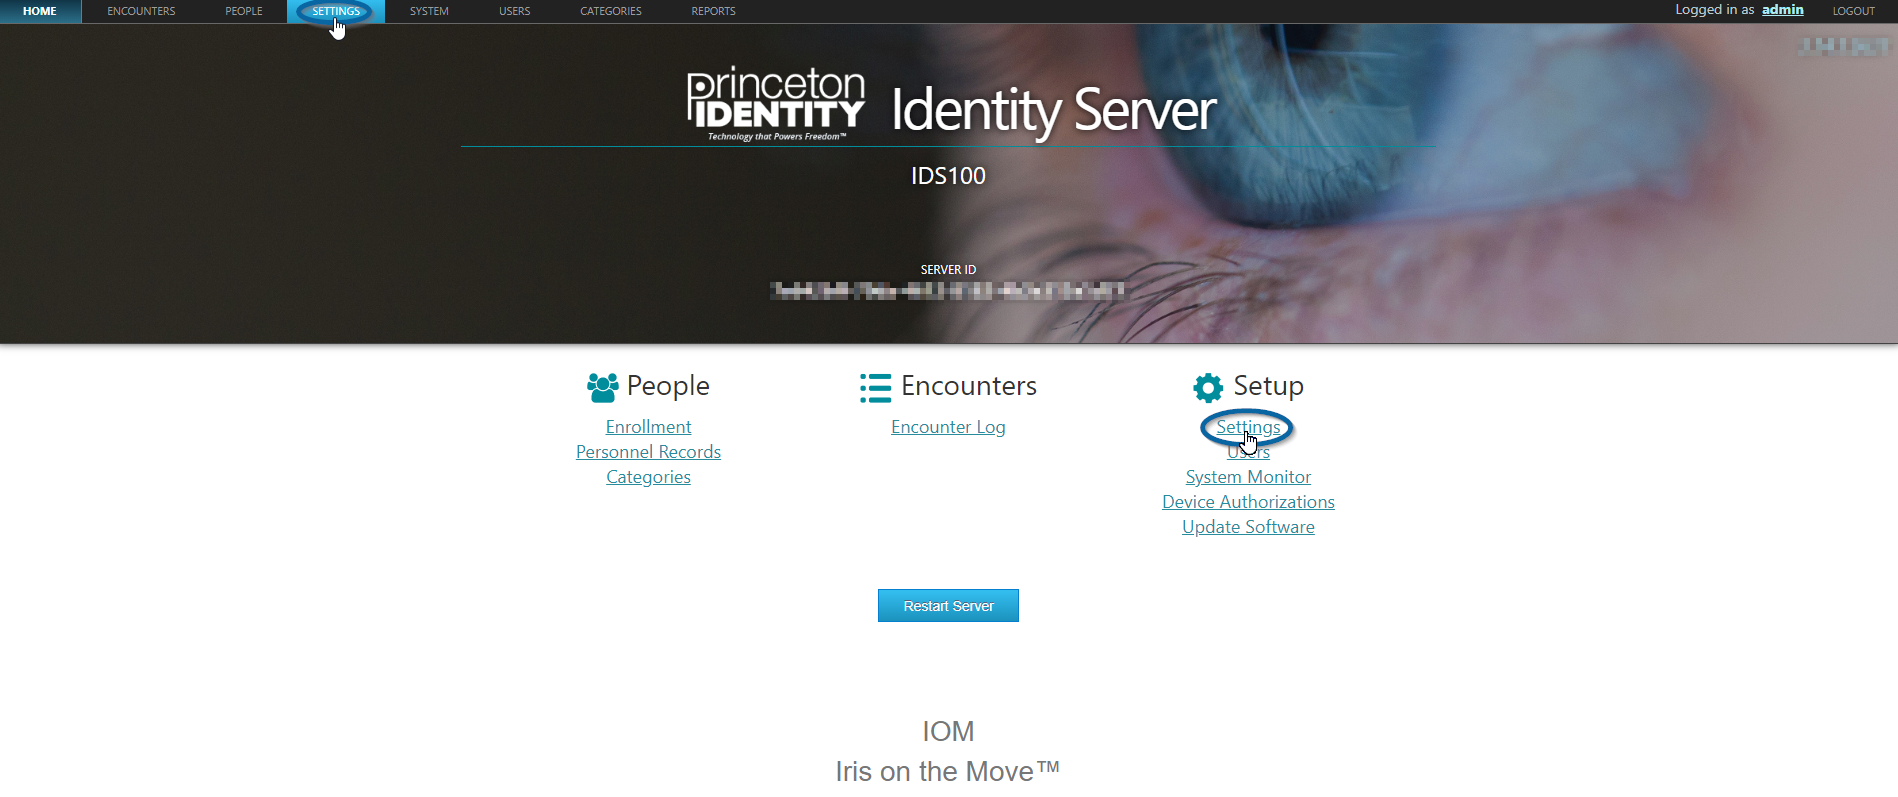
The locations of the "Settings" links on the home page
On the left side of the "Settings" page, click on "Backup".
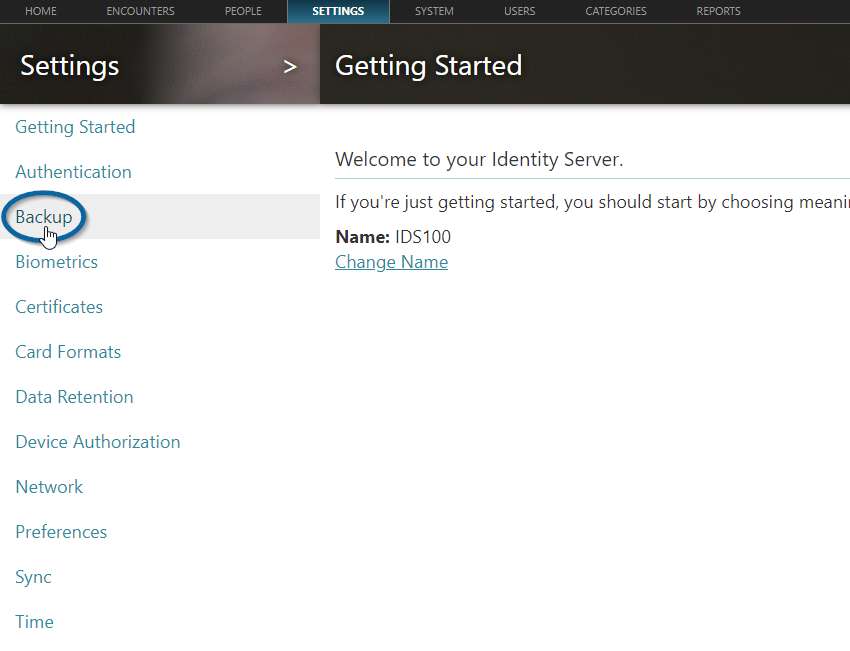
The location of the backup link
In the middle of the "Backup" page, click on "Configure Backup/Restore".
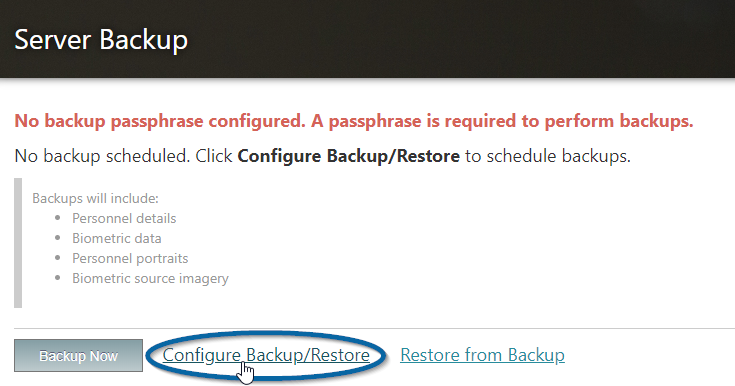
The location of the "Configure Backup/Restore" link
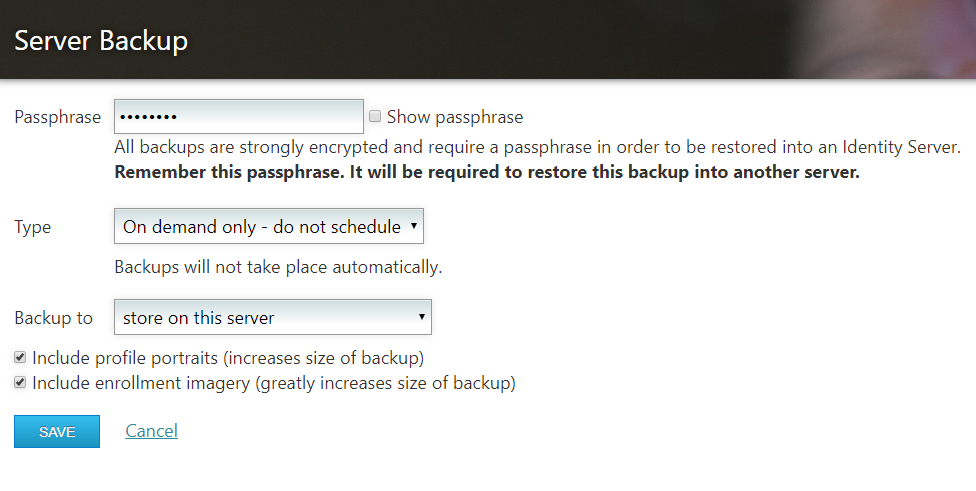
Now you can configure your backup.
The backup configuration page before configuration
A passphrase must be chosen in order to run your backup. We recommend a strong passphrase of at least 8 characters and which is not a dictionary word. This passphrase must be re-entered when you restore the backup to any server. If you do not remember the passphrase, then the backup cannot be restored.
You can then select the type of backup that you want: "On demand", "Daily", or "Weekly". If you select "Daily" or "Weekly" then your backup will occur regularly at the chosen interval. You must select the time you wish the backup to occur, and the day of the week (if "Weekly" is chosen). The time is a 24 hour clock and is based on the system time of the IDS, which you can view by navigating to the "Time" section of the "Settings" tab.
Then you can select where you wish to save the backup to. "Store on this server" will save the backup directly to your IDS, and will also allow you to manually download that backup after it takes place. This download link will appear on the main backup setting screen next to "Backup available". When choosing "Store on this server" only one backup will be stored on the server at a time. In order to retain more than one backup when using this save location, you must manually download the backup after it has been made.
The two backup transfer methods are "transfer to remote server (FTP/FTPS)" and "transfer to network share (SMB)". When selecting either of these methods you must provide the URL, Username, and Password for the chosen method. For FTPS, you must check the box to enable this protocol. If your system supports FTPS, then we recommended that you use it.
Finally, you can select if you would like to include profile portraits and source enrollment imagery. These options will increase the overall size of your backup. Biometrics and enrolled templates will be backed up regardless of these checkbox settings. Choosing to exclude enrollment imagery will still include biometrics.

The backup configuration page after configuration
Run the Backup
Now that you have created a passphrase and chosen the appropriate settings, you can run your backup.
Regardless of how you have configured your backup, you can manually run the backup at any time by clicking on the blue "Backup Now" button.
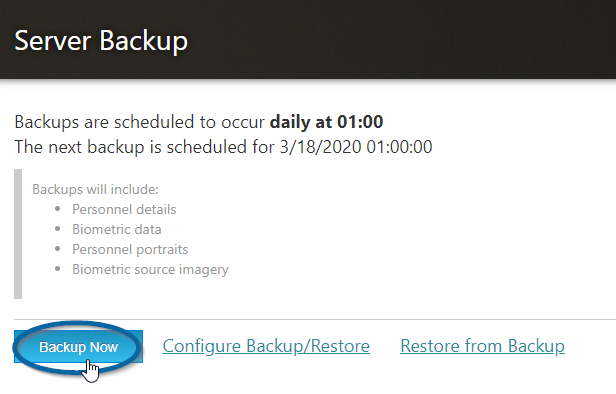
The "Backup Now" button to start a back up at any time
After clicking the "Backup Now" button, the backup will begin. During this time, the backup screen will indicate that a backup is in progress.
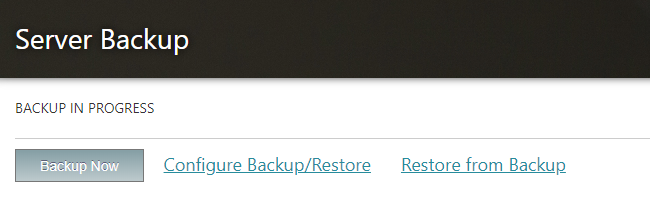
The backup screen when a back up is in progress
When the backup is complete, the screen will indicate when the last successful backup occurred.
If you chose to store the backups on the IDS then you will see text showing that there is a backup available. By clicking on the link next to "Backup available" you will download the backup to the computer that you are using to access the IDS web page.
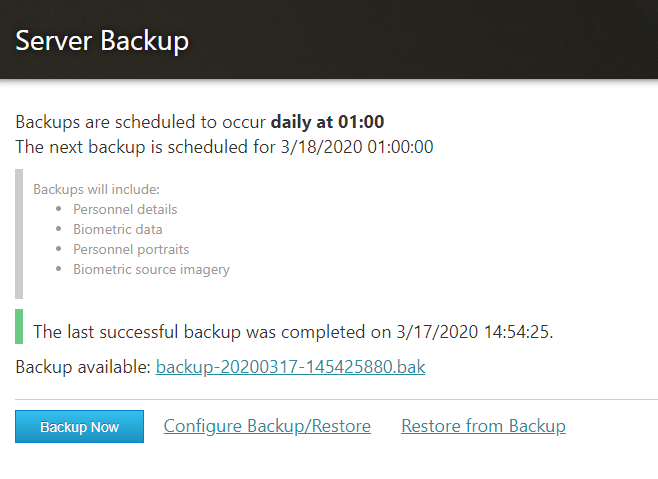
The backup screen after a successful backup
If you have chosen to have a scheduled backup, then this will run automatically at the specified time and day.