Princeton Identity's EmbraceID solution allows administrators to enable Single Sign-On (SSO)/SAML. This allows administrators, enrollers, and basic users to use already existing usernames and passwords to log in to the Princeton Identity Identity Server (IDS).
Adding IDS to the SSO provider
Log in to the SSO provider and add a new SAML application.
The following settings will need to be configured:
- Assertion Consumer Service=https://<ids-ip-address>:8443/saml/SSO
- Entity ID=com:yournamehere
- Application URL=https://<ids-ip-address>:8443
- Single Logout Endpoint=https://<ids-ip-address>:8443/saml/logout
- Single Logout Response Endpoint=https://<ids-ip-address>:8443
- Single Logout Binding Type=Post
Note that when using custom certificates, you will need to use the hostname of the server in the settings above, instead of the IDS IP address.
Next, open the Identity Server webpage and use your web browser to download the network certificate that it is using. This will typically be exported as a Base-64 encoded .CER file.
Downloading the certificate file
Using the downloaded .CER file, upload it as the Primary Verification Certificate field of the SSO provider.
Save the configuration and download the SAML Metadata file.
Enable the SAML application in the provider.
Enabling SSO on Identity Server
Log in to the Identity Server (IDS) as a user with the "administrator" role.
Navigate to "Settings" -> "Authentication" and click on "Configure authentication".
Authentication settings page
Next, check the box for "SSO (SAML) Authentication".
Click the button that says "Browse for file..." and upload the SAML metadata file that was downloaded from the SSO provider. A green check will display on the web page.
NOTE: Any changes that you make in Microsoft Azure/Entra ID MUST be saved to the Federation Metadata file. You MUST download and re-upload it to the IDS to reflect any changes.
Uploading the Federation Metadata file
Click SAVE and then return to the "HOME" page and click on "Restart Server". Note that the settings will not take effect until the server has been restarted.
The last step is to add the SSO usernames into the Identity Server. This is done on the "USERS" page. When creating a user, the "username" must be the same as the SSO username, and the user must be assigned a "Role". Do not set a password for these users because SSO will be used for authentication.
Using SSO
Once SSO is configured and users added to the user list, they can login. On the Identity Server login page, there is a link to "Login with SSO". Click this link and you will be redirected to your SSO provider web page to log in. When the log in is complete, you will be redirected back to the IDS web page to use the system.
IDS login page with link to use SSO
Optional: Configure SSO with Azure AD
The steps below are for configuring IDS to use SSO (SAML) with Azure Active Directory. This is for users who desire the capability of enabling Single Sign On with Azure Active Directory.
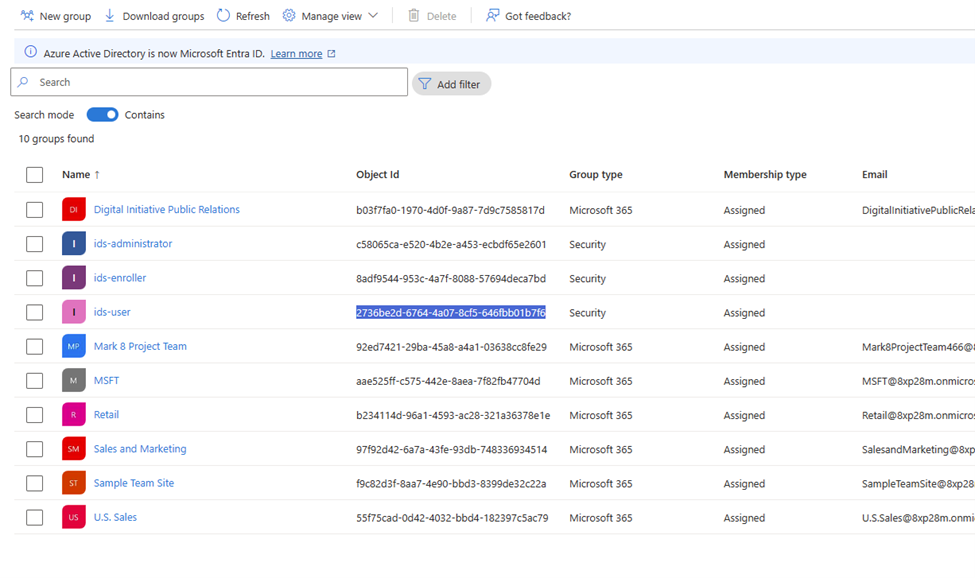
Step #1: Create a group in Microsoft Entra Id. Ensure that "Microsoft Entra roles can be assigned to group" is enabled.
Copy the group id for the newly created group to a notepad. You'll need this to the configure IDS with Azure groups:
Step # 2: Configure IDS application in Azure Entra ID (Azure Active Directory):
• Login to Azure portal.
• Search for Entra ID.
• Navigate to Enterprise applications:
• Create New application:
• Click on Create your own application to create a non-gallery application:
Provide the name of application and select the last option (non-gallery):
• Click Set up single sign on to start sso configuration:
• Configure basic SAML:
• Add Identifier, reply url, and sign on url:
Identifier - com:princetonidentity
Reply url – https://{ip}:8443/saml/SSO
Sign on url - https://{ip}:8443/saml/login
• Save the settings.
• Click on the Edit icon for Attributes and Claims
Copy the group's claim url to a notepad. You'll need this to configure IDS with Azure groups.
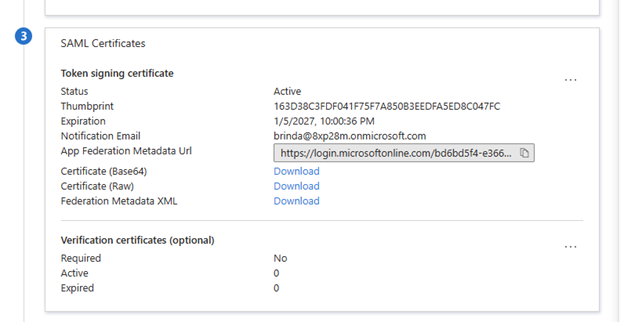
• Download Federation Metadata xml. We will need this to configure IDS for SAML
NOTE: Any changes that you make in Microsoft Azure/Entra ID MUST be saved to the Federation Metadata file. You MUST download and re-upload it to the IDS to reflect any changes.
Step #3: Assigning Roles to Application in Azure:
login to https://entra.microsoft.com/
From Application > App registration > select the created application to assign the role
Click on app roles
Click Create app role and provide the information related to role on Create app role panel
The newly created role should be available in the list of roles.
Navigate to the application on azure portal and click on Assign users and groups to add groups
to application.
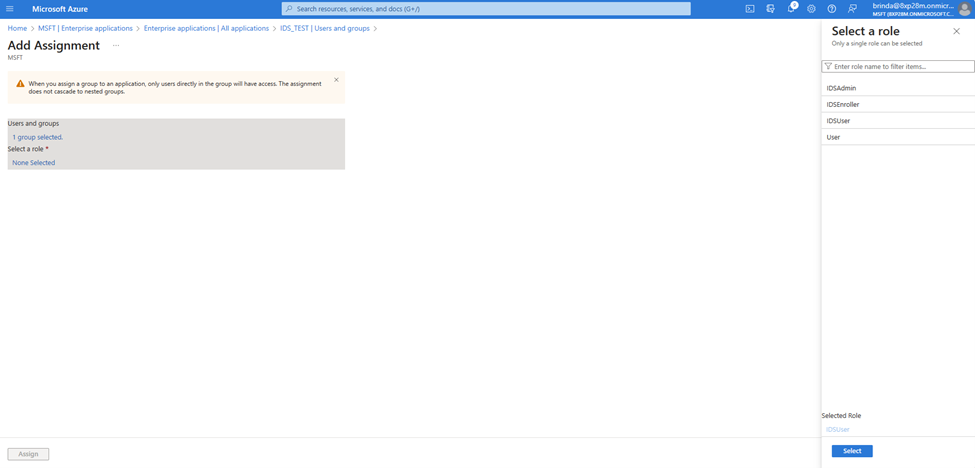
Step #4: Assign user/group to application in Azure
Click Add user/group
Select the group created in step#1
Select the role created in step#3 and assign.
Step #5: Configure IDS for SAML
In IDS, go to Settings > Authentication, check SSO (SAML) Authentication and uploaded
downloaded Federation Metadata xml file from the above step.
Check Use Azure Role.
Provide azure groups claim url that we have in notepad from step#2
Map group id we noted from step#1 to appropriate IDS role.
Alternatively, you can use the role created in step #3. The claims url for role is same as the claims url for
groups, you'd just replace groups with role.
http://schemas.microsoft.com/ws/2008/06/identity/claims/role
Entity Base Address: the machine's hostname, with no http/https or port, ex: testmachine1
Map the azure role with IDS role:
• Restart IDS
• Login to IDS using Login with SSO